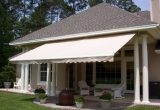
How to install a wall-mounted awning on brick or stucco
A wall-mounted awning can make a patio, courtyard or terrace comfortable through Australia’s intense summer sun and sudden summer rain. Knowing how to install a wall-mounted awning on brick or stucco requires careful attention to the wall structure, fixing method, wind loading and local approval requirements. In Australia, “stucco” usually describes cement render applied over brick, block or another substrate.
The local market offers folding-arm, retractable, sliding and fixed awnings for homes of every size. Retractable models are convenient for narrow urban courtyards, while fixed awnings provide dependable shade over outdoor dining areas. Brick facades are common in Sydney terraces and Melbourne homes, and many Queensland properties use rendered masonry suited to strong ultraviolet exposure and heavy rainfall.
Installation should begin with a measured plan rather than a collection of general-purpose masonry plugs. The brackets, anchors and awning model must suit both the wall and the expected wind conditions. Working at considerable height also creates risks, so professional installation is generally the safest choice for large, powered or elevated awnings.
Plan the location, dimensions and approvals
Choose the awning according to what happens beneath it. Door openings, barbecue areas, windows and pedestrian paths require different levels of protection. Check the afternoon sun direction, prevailing winds, drainage routes and views from neighbouring properties. Sydney’s narrow terraces often have little room for a large projection, whereas a Melbourne courtyard may benefit from a deeper folding-arm awning that can retract when wind or rain increases.
Before ordering, measure the wall width, available fixing points and the distance from the proposed awning edge to the ground. Maintain sensible headroom beneath the frame, particularly where the area forms a walkway or outdoor dining space. Confirm that the awning will not obstruct windows, gutters, exhaust vents, service lines or emergency exits. Retractable awnings also need a safe electrical supply and suitable control location.
Approval requirements vary between states and councils. Ask the local authority whether the proposed awning requires a building permit or drawing, especially if it is fixed to a heritage-listed building or forms part of a covered outdoor area. Apartment owners may also need body corporate approval. Wind performance should be specified with reference to the National Construction Code and AS/NZS 1170.2, while the installer should provide a written structural assessment and warranty. If an awning will sit beside new landscaping, ideas from this raised-bed fence project can help create a coordinated outdoor area.
Choose an awning system for Australian conditions
Folding-arm awnings extend over patios and retract tightly against the wall. Their articulated arms move with the wind, making them a practical option where a rigid frame would catch gusts. Retractable awnings use a cassette and roller, often with sensors and remote controls. They provide the greatest flexibility for Australian homes where outdoor areas may alternate between sun, shade and rain.
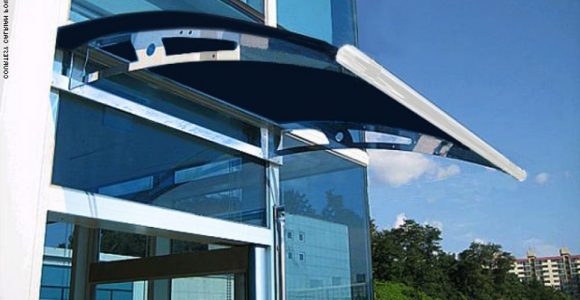
Fixed awnings are the simplest mechanically, but their wind rating and projection need close scrutiny. They work well over rear doors in sheltered suburban gardens, provided the brackets and structure are designed for the load. Sliding awnings suit narrower spaces, while upright styles can preserve views. Colour, frame finish and fabric pattern should also coordinate with brickwork, render, doors and fences rather than appearing as an isolated addition.
Fabric choice matters in Australia. UV-stable outdoor acrylic or solution-dyed polyester can resist fading better than untreated canvas. Check colourfastness, water repellency, seam construction and cleanability. Coastal locations such as Sydney, the Gold Coast and Perth require corrosion-resistant aluminium and appropriate stainless-steel hardware. Broader material and furnishing ideas are available from French Creative Connection.
Inspect the brick or stucco substrate
Begin by identifying what sits behind the wall finish. Solid clay brick can usually accept properly specified masonry anchors. Hollow bricks contain cavities and may crumble if loaded through only their outer face. Brick veneer may conceal timber or steel framing, while a rendered wall can cover brick, block, foam panels or a mixed substrate. A rendered appearance does not reveal the structural material underneath.
Inspect the wall for cracks, damp, failed render, loose mortar and previous fixing holes. Use a masonry bit to make a small test hole where permitted, allowing the material to be examined without weakening the proposed fixing point. Avoid weak mortar joints unless the bracket system is specifically designed for them. Solid-brick walls may suit chemical anchors or approved expansion anchors, while hollow brick normally requires a cavity-fixing sleeve, through-bolt or fixing into a structural header.
For stucco or cement render, do not rely on the render itself. Select anchors long enough to reach the masonry or framing behind it, and account for the render thickness. Firm render can conceal a hollow or deteriorating wall, so testing and professional advice are valuable. A useful second opinion on unusual substrates can be obtained through myIND168 design guidance, particularly when coordinating the awning with a complex facade or compact outdoor layout.
Compare the fixing options
The correct fixing depends on the material, load and bracket design. The following comparison highlights the usual approach for common Australian wall constructions.
| Wall condition |
Typical fixing approach |
Essential checks |
| Solid clay brick |
Chemical anchor or approved expansion anchor |
Brick strength, mortar joints, corrosion rating and penetration seal |
| Hollow clay brick |
Cavity sleeve, through-bolt or structural-header fixing |
Avoid relying on the thin outer face shell alone |
| Brick veneer with framing |
Long masonry anchor or through-fixing to approved framing |
Locate timber or steel and obtain structural confirmation |
| Rendered brick or block |
Anchor passing through render into sound masonry |
Assess render condition, substrate depth and waterproof detailing |
These are starting points rather than universal instructions. Older brick can be brittle, and face shells or mortar joints may not carry the same load as the bracket manufacturer intends. Adhesive anchors also require correct hole preparation, clean conditions and the specified cure time. For wide projections, high mounting positions or unusual walls, have the fixing load calculated by a qualified builder or engineer.
Moisture management is as important as structural strength. Every penetration should be sealed with a compatible exterior-grade system, while brackets may need isolators to prevent water tracking into the wall. Stainless-steel packers can correct uneven brickwork, but they must not distort the bracket or create a path for water. Flashings, drip edges and the awning’s own water discharge should direct runoff away from windows and foundations.
Install, test and finish the awning
Set out the bracket positions from the manufacturer’s instructions, using a laser level or suitable straightedge. Check the full width, projection and diagonal measurements before drilling. Install anchors according to their load rating and cure time, then secure the brackets with the specified washers, bolts and torque. The frame must remain level and true without forcing the wall or compressing packing excessively.
- Match each anchor to the verified wall material rather than selecting by diameter alone.
- Use corrosion-resistant fixings suitable for the property’s distance from the coast.
- Seal every bracket penetration and inspect the joints after the first rain.
- Confirm the awning’s wind rating before installation, not after a storm forecast.
- Retain the fixing calculations, product documentation and installation warranty for future reference.
Fit the arms, roller or fixed canopy once the brackets are secure. Check fabric tension, roller operation, drainage and frame alignment. Powered awnings should be connected by a licensed electrician using the manufacturer’s specified cable, circuit protection and controls. Limit switches and wind sensors must be tested rather than assumed to function correctly.
Operate the awning through its full travel and inspect it from the ground. Look for binding, excessive sag, loose fittings or water collecting in the frame. Adjust the tension and alignment within the manufacturer’s limits, then clean the fabric and remove construction debris from gutters and paving. Record servicing intervals for sensors, roller mechanisms, anchors and waterproof seals, especially before summer.
A properly installed awning can provide shade, weather protection and a more useful outdoor room for years. Book a qualified installer, provide the wall and awning measurements, and obtain a written fixing plan before the first bracket is drilled.