Nuloom Outdoor Rugs
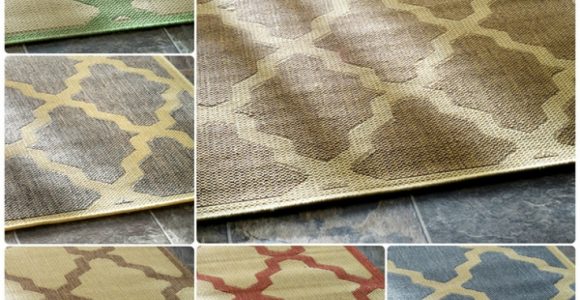



Nuloom Outdoor Rugs with pictures released for to offer the concepts to influence enhancing your home. This post of Nuloom Outdoor Rugs have of our collection pictures as well as gallery for embe...
Nuloom Outdoor Rugs with pictures released for to offer the concepts to influence enhancing your home. This post of Nuloom Outdoor Rugs have of our collection pictures as well as gallery for embe...
A curved paver walkway can make a front garden, side passage or backyard feel more welcoming than a rigid straight path. The gentle change of direction creates a natural journey between the driveway, porch, patio, shed or entertaining area, while paving provides a firm, low-maintenance surface for everyday foot traffic.
The key is to treat the curve as a structural feature rather than simply an attractive outline. Good marking, a stable compacted base, careful edge restraint and thoughtful drainage will determine whether the finished path remains level through Australian heat, rain and seasonal ground movement.
| Paving approach | Best suited to | Main advantage | Main consideration |
|---|---|---|---|
| Concrete pavers | Front paths and busy side access | Consistent sizes and broad availability | Can look formal without planting or varied borders |
| Clay brick pavers | Heritage homes and cottage gardens | Warm colour and timeless character | Some products may chip or vary in size |
| Natural stone | Premium gardens and landscaped courtyards | Individual texture and colour | Higher cost and more difficult cutting |
| Large-format pavers | Contemporary homes and broad paths | Fewer joints and a clean appearance | Curves require more precise cutting |
| Small modular pavers | Tight curves and informal gardens | Easier to follow a sweeping line | More laying time and more visible jointing |
Begin by deciding where people naturally walk. A path that follows the existing route from the front gate to the entry will feel intuitive, while a curve that avoids a tree, frames a lawn or leads towards a seating area can give the garden more visual depth. Use a hose, rope or flexible garden edging to draw the proposed line on the ground. Walk along it several times and check that the bend feels comfortable rather than cramped.
Allow a practical width of at least 900 millimetres for a single-person residential path. Around an entry, bin area or outdoor dining zone, 1.2 metres gives people more room to pass. Very tight curves can make standard rectangular pavers awkward to position, so a broad radius usually creates a better result with less cutting. Mark both edges and measure the length and average width to estimate the paving area.
Add approximately 10 per cent to the calculated paver quantity for cuts, breakages and future repairs. Curved layouts produce more offcuts than straight runs, particularly where the outside edge needs wedge-shaped pieces. Before finalising the design, review the colours available at local landscape suppliers in Melbourne, Sydney or Brisbane, since stock ranges and delivery charges can vary considerably between regions.
A path can also be part of a wider outdoor improvement. If it leads to a covered seating space, consider how the paving will meet a pergola, step or patio slab. This simple pergola guide can help coordinate the walkway with overhead shade and the surrounding entertaining zone.
Remove turf, roots, loose soil and organic matter from the marked area. Excavate deeply enough for the pavers, bedding sand and compacted road base. A typical pedestrian path may need around 100 to 150 millimetres of compacted road base, topped with 25 to 40 millimetres of bedding sand, although local soil and paving specifications should guide the final depth.
Australian ground conditions differ widely. Reactive clay around parts of Adelaide, Melbourne and Canberra can expand when wet and shrink during dry periods, so a well-compacted foundation and effective water control are especially important. Sandy Perth soils may drain quickly but can shift if the base is not thoroughly compacted. In areas affected by heavy summer storms, such as southeast Queensland, give surface water a clear route away from the house.
Shape the excavated base with a slight crossfall, commonly around 1:80 to 1:60, directing water towards a garden bed, lawn or suitable drainage point. Never allow the finished path to slope towards the building unless a properly designed drain intercepts the runoff. Keep damp-proof courses, weep holes and thresholds clear, and avoid raising paving above the level that could allow water into the home.
Before digging, check for irrigation lines, electrical conduits and other services through Before You Dig Australia. Some councils or body corporates may require approval for work that changes stormwater flow, affects a verge or sits near a property boundary. Confirm local requirements before excavation, especially on sloping blocks or heritage-listed properties.
Spread road base in layers no thicker than about 75 millimetres and compact each layer with a plate compactor. Lightly dampening dusty material can help it bind, but avoid saturating the excavation. The finished base should be hard, even and shaped to the planned fall. If footprints remain visible after compaction, continue working the area before adding sand.
Edge restraint keeps the outer pavers from spreading when people walk over them or when the ground moves. Flexible plastic edging can follow a broad curve, while galvanised steel, concrete haunching or purpose-made paver edging provides a firmer finish. Set the restraint so it supports the pavers without becoming a trip hazard. Along a lawn, a discreet edge makes mowing easier; beside a garden bed, a slightly raised border can hold mulch in place.
Use a string line, long straightedge or level to check the base frequently. Curves can disguise dips, especially when viewed from an angle. A gradual fall is preferable to a series of abrupt changes, and the base should remain consistent beneath every section of the walkway. Do not rely on the bedding sand to correct major irregularities, as thick sand pockets can lead to settlement.
For larger residential projects, hiring a compactor and wet saw is often more economical than buying equipment. Landscape yards commonly sell road base, washed sand, polymeric jointing sand and pavers as separate products, allowing you to match quantities to the project. Keep a few spare pavers after completion so future repairs use the same colour and profile.
Spread bedding sand across only a manageable section, then screed it with two level rails and a straight board. The sand should be smooth and even without being walked on unnecessarily. Begin at the most visible or fixed point, such as the porch, and work outward. If the path meets an existing slab, leave an appropriate movement gap rather than forcing the pavers tightly against it.
On a curved path, lay the full pavers through the central section first. Keep joint widths consistent and use a rubber mallet for small adjustments. Avoid dragging a paver across prepared sand because this creates hollows. Check the alignment from several viewpoints, including the front window and garden entrance, since a curve that looks accurate from ground level may appear uneven from the house.
The inner edge of a bend normally needs smaller cuts, while the outer edge may require larger tapered pieces. Mark each cut individually instead of assuming the curve is perfectly symmetrical. A diamond blade on a wet saw produces cleaner results than repeated scoring, and eye, ear and respiratory protection are essential when cutting masonry. Do not use a dry saw in an enclosed area where silica dust can accumulate.
Keep cut pieces at least 100 millimetres wide where possible. Narrow slivers are prone to movement and can weaken the visual rhythm of the path. If the design requires many tiny pieces, widen the curve, choose smaller modular pavers or introduce a deliberate contrasting border. A soldier-course edge or darker outer band can make the geometry look intentional while simplifying the cuts.
Once all pavers are positioned, sweep jointing sand across the surface and vibrate the paving with a plate compactor fitted with a protective mat. Make several passes in different directions, then refill the joints. Follow the product instructions carefully, particularly if using polymeric sand, as some products require a dry surface and controlled watering. Remove excess material from the paver faces before it bonds.
Inspect the path after the first substantial rain and again after several weeks of use. Small depressions may indicate an under-compacted base and should be repaired early by lifting the affected pavers, correcting the foundation and relaying them. Keep leaves, mulch and soil from blocking drainage edges. In shaded, damp areas, occasional sweeping reduces moss and slippery organic build-up.
Sealing is optional rather than essential. It can deepen colour and make some porous pavers easier to clean, but coatings may alter the appearance or reduce slip resistance. Choose a breathable, exterior-rated product compatible with the specific paving material, and test it on an offcut first. Light-coloured pavers can remain more comfortable under intense summer sun, while darker surfaces may absorb heat near outdoor seating.
For a cohesive landscape, soften the hard edges with drought-tolerant planting, gravel, ornamental grasses or low-growing groundcovers. Select species suited to the local climate and avoid invasive roots close to the base. A considered border makes the curved walkway look integrated with the garden rather than placed on top of it. When planning the broader entertaining area, understanding how small visual prompts influence decisions can also be useful; this explanation of the pokies nudge feature offers an example of how design cues can affect behaviour in another setting.
Set aside time for careful marking, compaction and cutting rather than rushing the visible laying stage. For additional project inspiration and home improvement references, explore these practical design resources while comparing materials and layouts. Then mark the curve, prepare the base properly and create a paver walkway that adds comfort, character and lasting value to the Australian home.

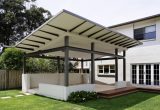
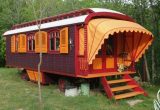
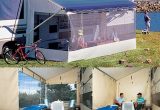
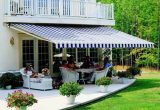
Awning definition, What is an awning? An awning is a cover made from canvas to sanctuary individuals or things from rain or sunlight, usually one will certainly use words awning about a roof-l...
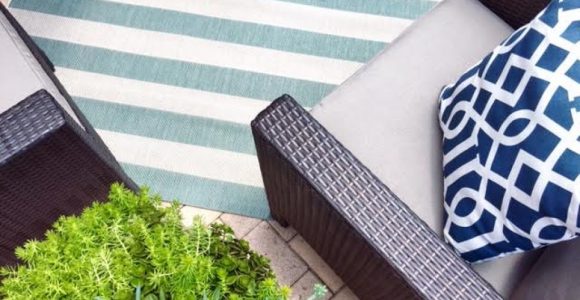



Frontgate outdoor rugs. These days embellishing does not have to be regarding custom-made, it could be regarding where to discover it currently and also exactly how to make it function for you. T...

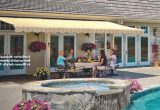
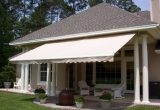


Retractable awning prices is influenced in various other means, too. On-line assemblers bill delivery costs, however this is more than balanced out by the reality they don't charge sales tax (bes...



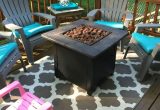

bed bath and beyond outdoor rugs (additionally called location rugs) not just include to the appearance of a space, yet likewise develop a setting including form, shade, and structure. Residence ...